

Build your first Serverless application 🚀

To start with, I love building applications and every aspect of it. Right from the inception where the application is still an idea or a solution to a problem or at times, a non solution to a non problem, visualising it to be a full fledged application used by everyone on the planet, to designing the solution and actually building the application, I love every bit of it! Software development, thus, is beyond profession for me, and is more of an obsession.
Since I started my career, I've had the opportunity to work with a wide range of technologies ranging from Java, Python, Springboot, Angular, React, Flutter, Scala, Docker, and AWS in domains like Telecom, Banking, and Insurance. With the ever evolving technologies in Software Development, I've also had the privilege to work on the three pillars of software architecture - Monoliths, Microservices, and Serverless.
Currently, in my role as a Tech Lead, my responsibilities spread across Solution Architecture, Backend Development, and Cloud Architecture. My go to language and framework for backend development remains to be Java and Springboot with not so occasional stints in Python. I have also been working elaborately with AWS and docker and have a pretty good hands-on experience with it. I lead a team that comprises of some of the best Backend, Frontend, and DevOps Engineers. And over the course of 15 months, we have delivered Bank Of Ireland's digital insurance platform, New Ireland's Broker application which was one of the first Serverless Applications delivered to a financial institution in Ireland, and Arachas' digital insurance platform.
I live by the motto "Learn, Build, Deploy" and thus in my free time, you would most likely see me learning something new - a coding language, a framework, an architecture pattern, a new tool for DevOps or automation or just solving a competitive programming challenge. I hope to be able to help other fellow developers or enthusiasts upskill or establish themselves in the industry through one on one help or through my blogs or workshops. In the rare occasion when I am not with my laptop, you would mostly find me in the park with my dog.
Look forward to connect with you!
This is a continuation of the Serverless series I've been working on. If you haven't read my previous article that covers what Serverless applications are and why are they gaining popularity, you can read it here or you can just continue with this one and build your first Serverless application.
Alright, let's get started. My choice of Cloud provider is Amazon Web Services (AWS) so in this article, we will be building the application using AWS and Python.
What do you need to build this application?
- Basic knowledge of Python.
- An AWS account. If you don't have one, you can register here. It's free 🤑
- A web browser. Yes, we will be building this application from your browser. Well, at least the backend. 🙂
What are we building?
We are building a simple TODO app where you can and read tasks. We will keep it simple so the focus is not the application itself but the underlying concept of Serverless applications. This application will have 2 REST APIs - GET and POST.
This is the architecture of the application we are building:
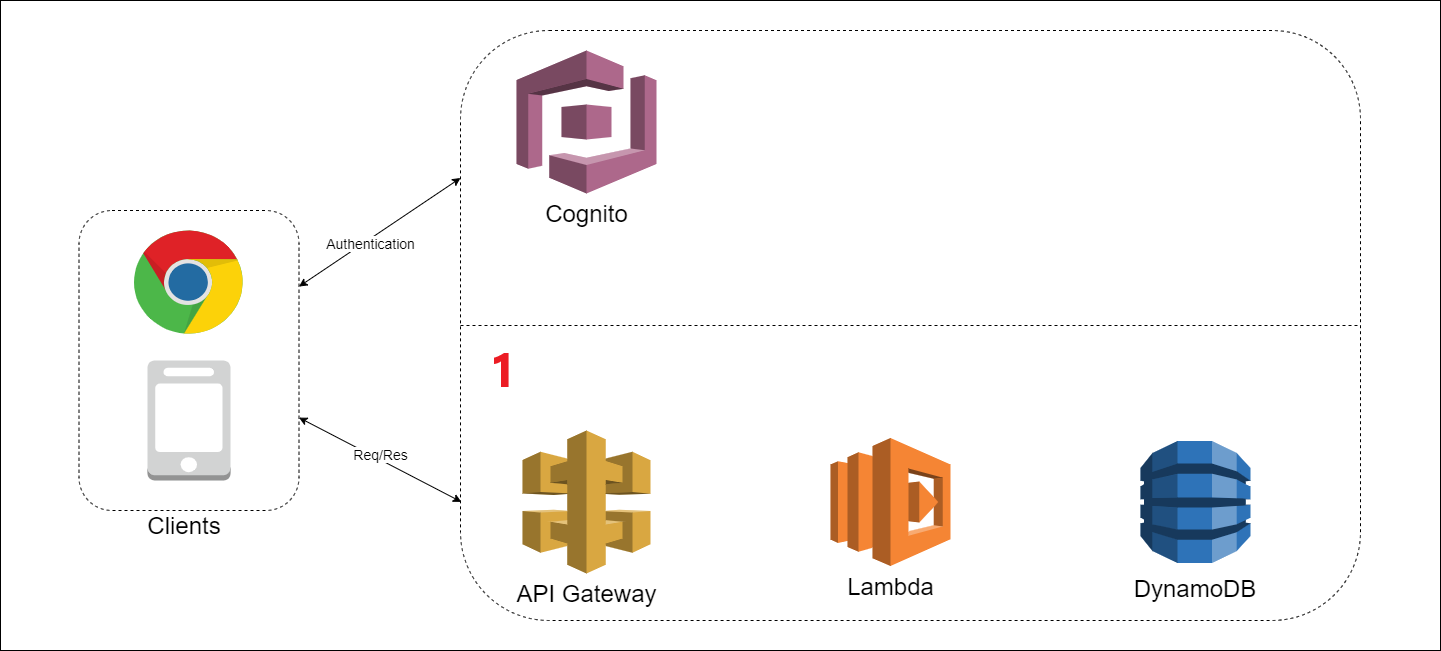
In this part, we are only building the part annotated with the number 1. This consists of the following components:
- Dynamo DB - This is the database we would be using to store our tasks. Dynamo DB is a fully managed proprietary NoSQL database service that supports key-value and document data structures.
- Lambda - This will be our compute platform. By that, I mean, Lambda is the service that will run our code. You will see how we use this service and write our code directly in it. I will refer to this part as the "function" throughout the article since Lambda is an example of Function as a Service.
- API Gateway - As the name sounds, this is going to be what exposes our function as an API. It is the entry point of our application.
Note that all these components are fully managed services meaning AWS looks after the hosting, infrastructure, as well as scaling of these services based on the traffic in our application. This is what makes our application Serverless 😎
Let's build!
Let's log in to the AWS console and first select the region where you want to build this application. Your region should be chosen based on where your users would be accessing it from. I am assuming you are building this application to learn about Serverless applications. So just choose the region closest to where you are right now. Remember to choose this region for all the services that we would be using in AWS throughout the article.
The database
Next, go to the Dynamo DB service. At the time of writing this article, you can find any AWS service by pressing alt + S once logged in to the console. Note that this may change since Amazon changes its UI for AWS very often. 🤦♂️
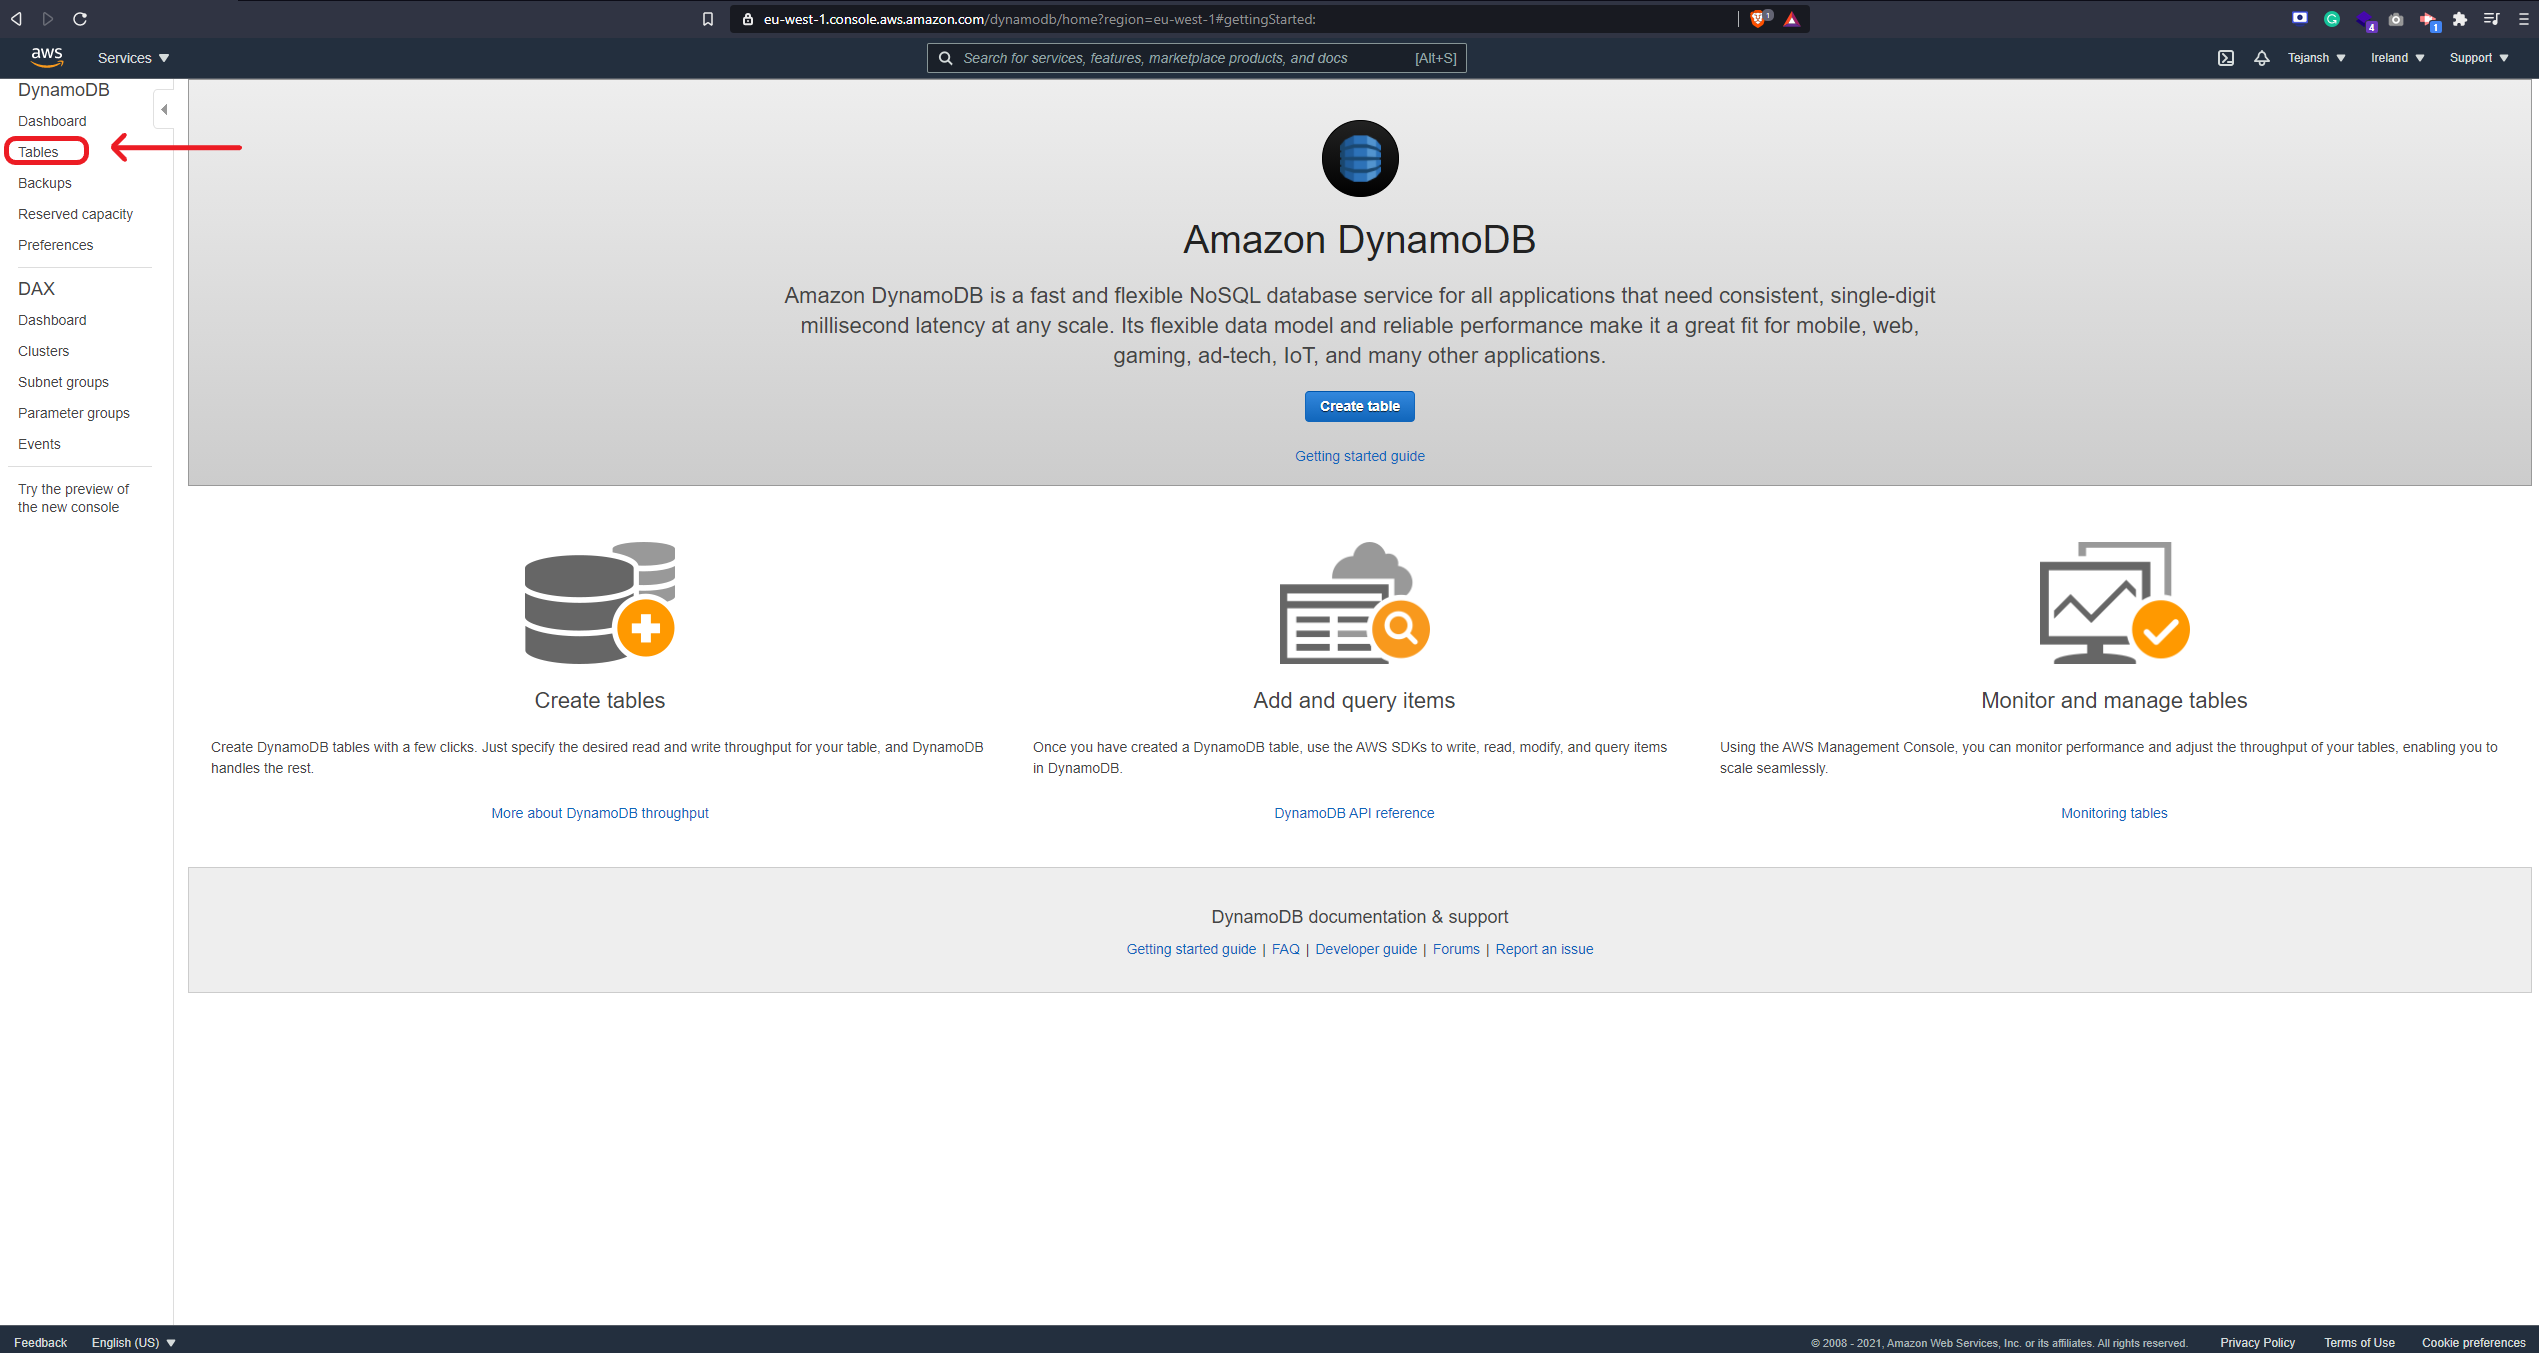
Once you are on the Dynamo DB landing page, click on table. You can find that here:
On clicking this you'd see a button called Create table. Click on that and enter a name for your table. I am calling this table todo-table. In the input area for Primary key enter id and leave it as a String. You can leave everything else as is and click on the create button. Give it a few seconds and your database is ready! Yes, just like that! 😁
The application
Next, go to the AWS Lambda service. Again, you can just press alt + S and enter Lambda and the service will show up. Once you are on the landing page, you can click on Create function button and that will open up a page where you will choose your language and name the function. Choose the Author from scratch option and enter a name for your function. I am calling it todo-get since we are first building the GET API. In the option for Runtime, choose Python 3.8. Now, click on Create function button and give it a few seconds to do its magic.
Now, you should see a page like below.
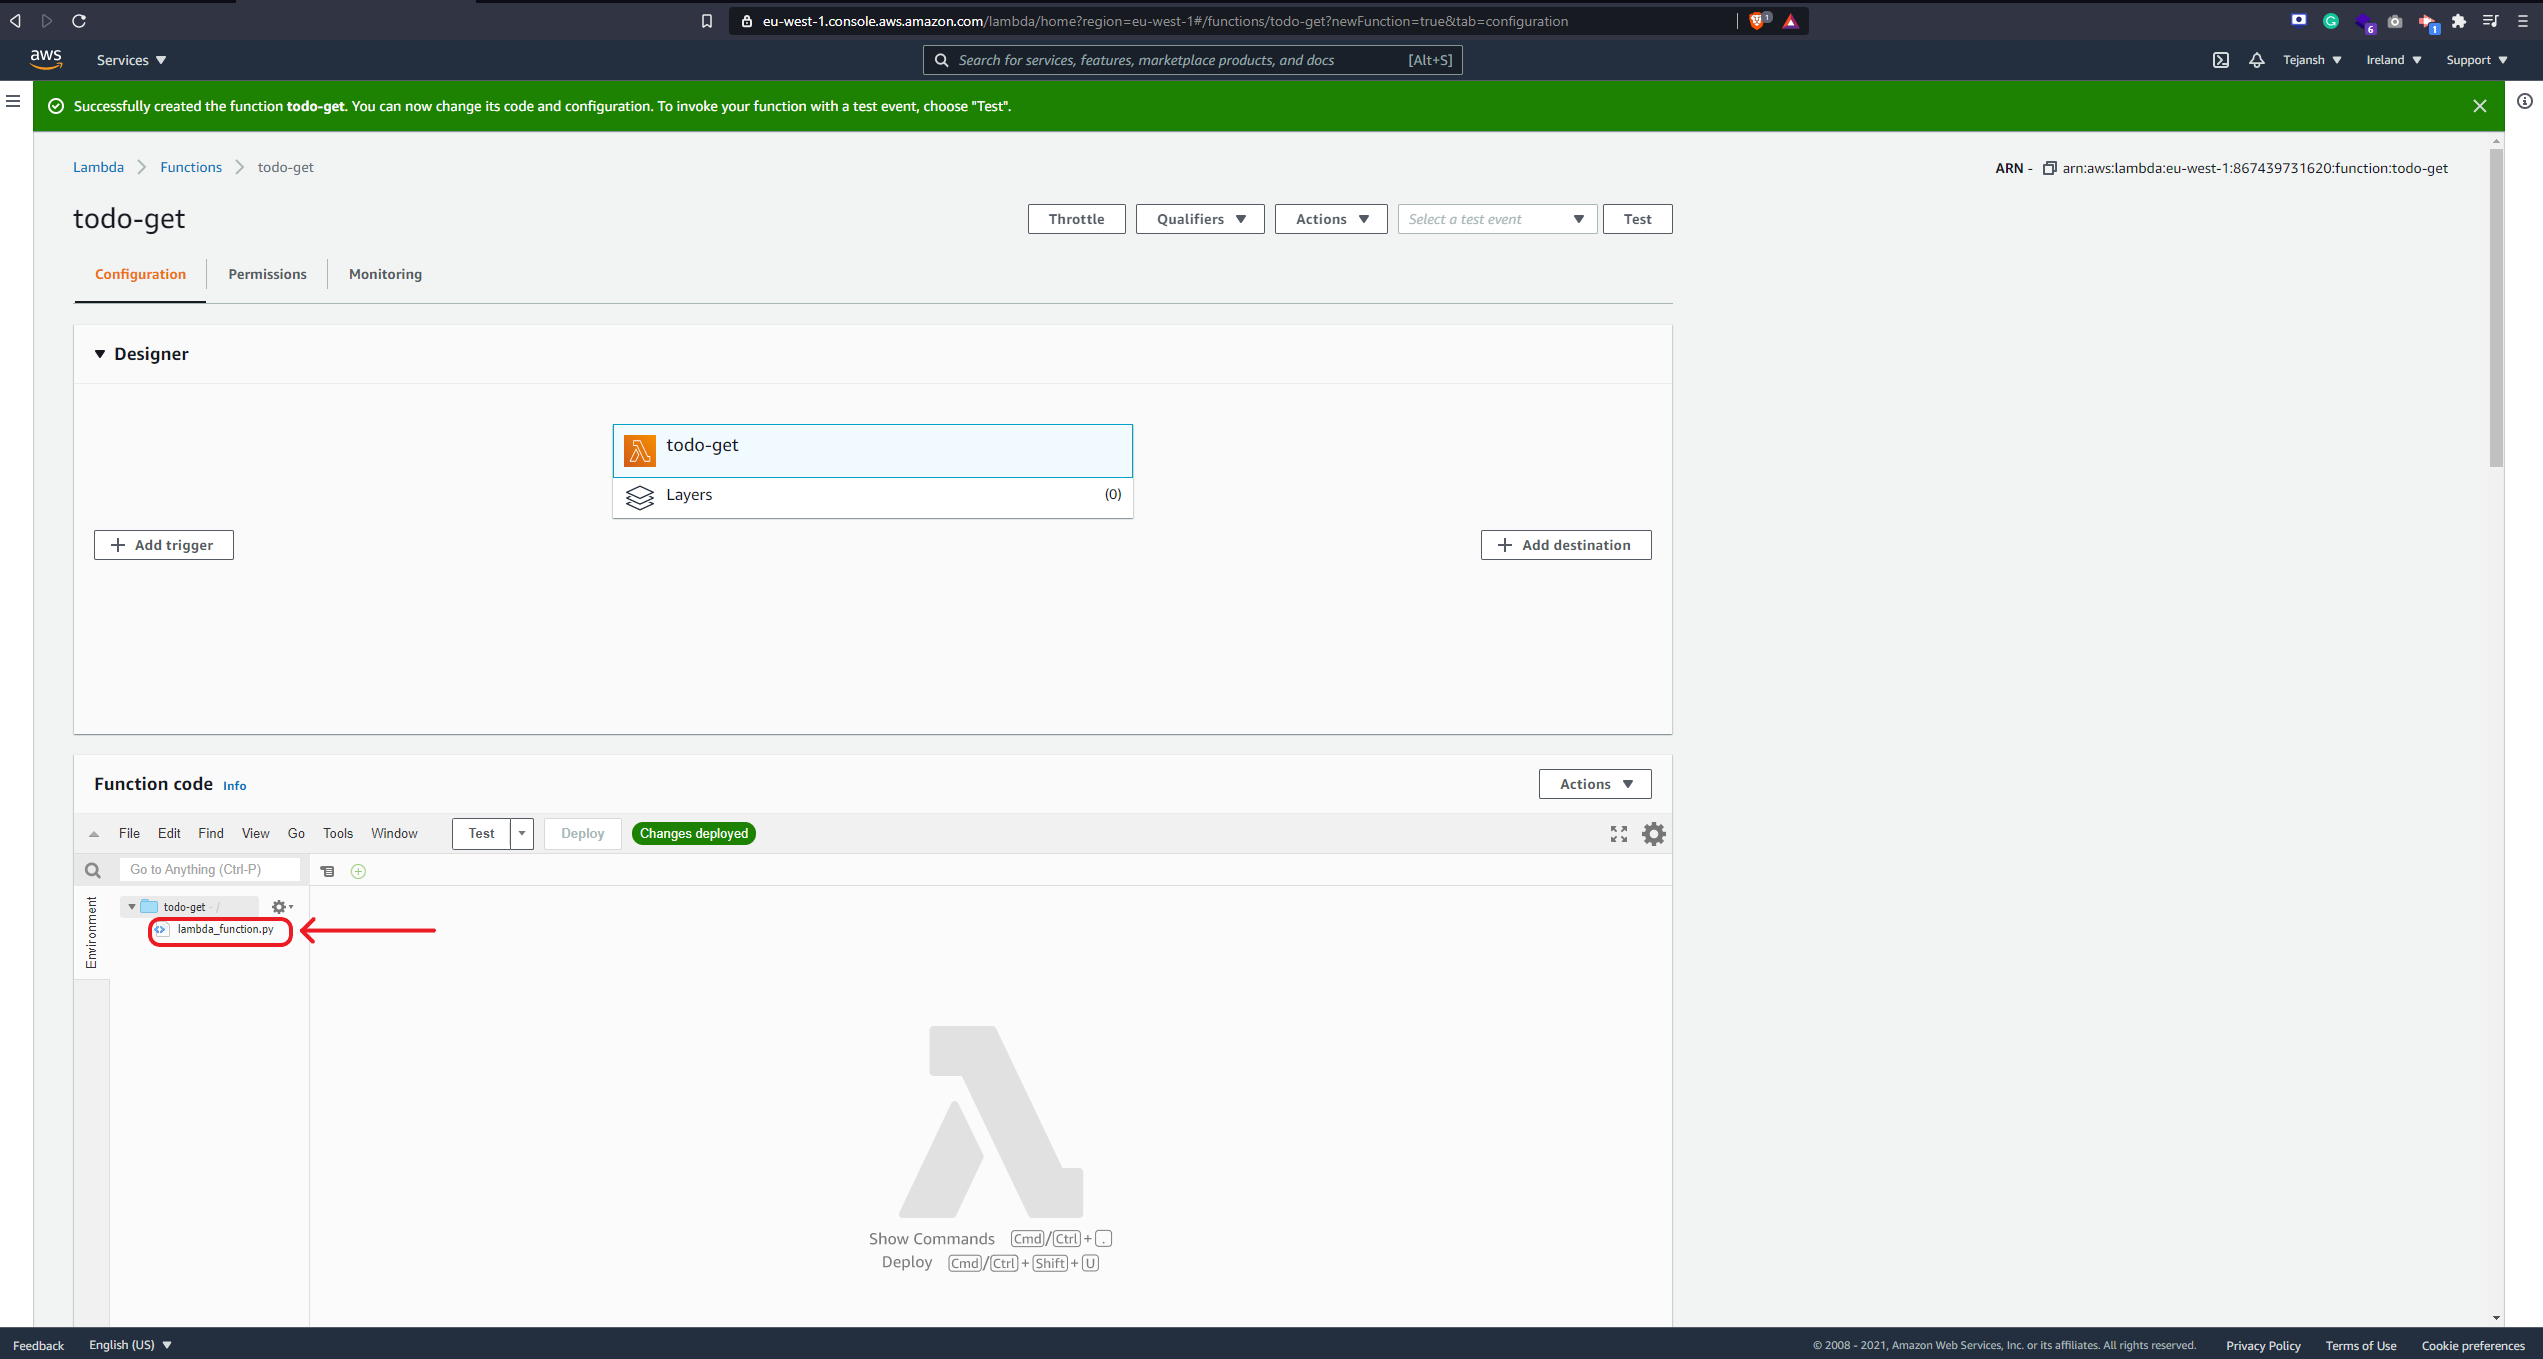
If you double click on the lambda_function, it will open the editor with some Python code in it. Now, we will write a simple function to get all the records from the todo-table Dynamo DB that we had created earlier. For this, we would be using the boto3 library which is the AWS SDK for Python
So, let's import the library and create a resource for DynamoDB:
   # Instead of "eu-west-1", you can enter the region that you had selected earlier:
    dynamodb=boto3.resource("dynamodb","eu-west-1")

   # Replace "todo-table" with the name of your table :
    table=dynamodb.Table("todo-table")
Next, let's get everything from the table and return it in the response with an HTTP status code 200. Below is the code snippet to do this:
# This will return everything from the table
  data=table.scan()
    return {
        'statusCode': 200,
        'body': data["Items"]
    }
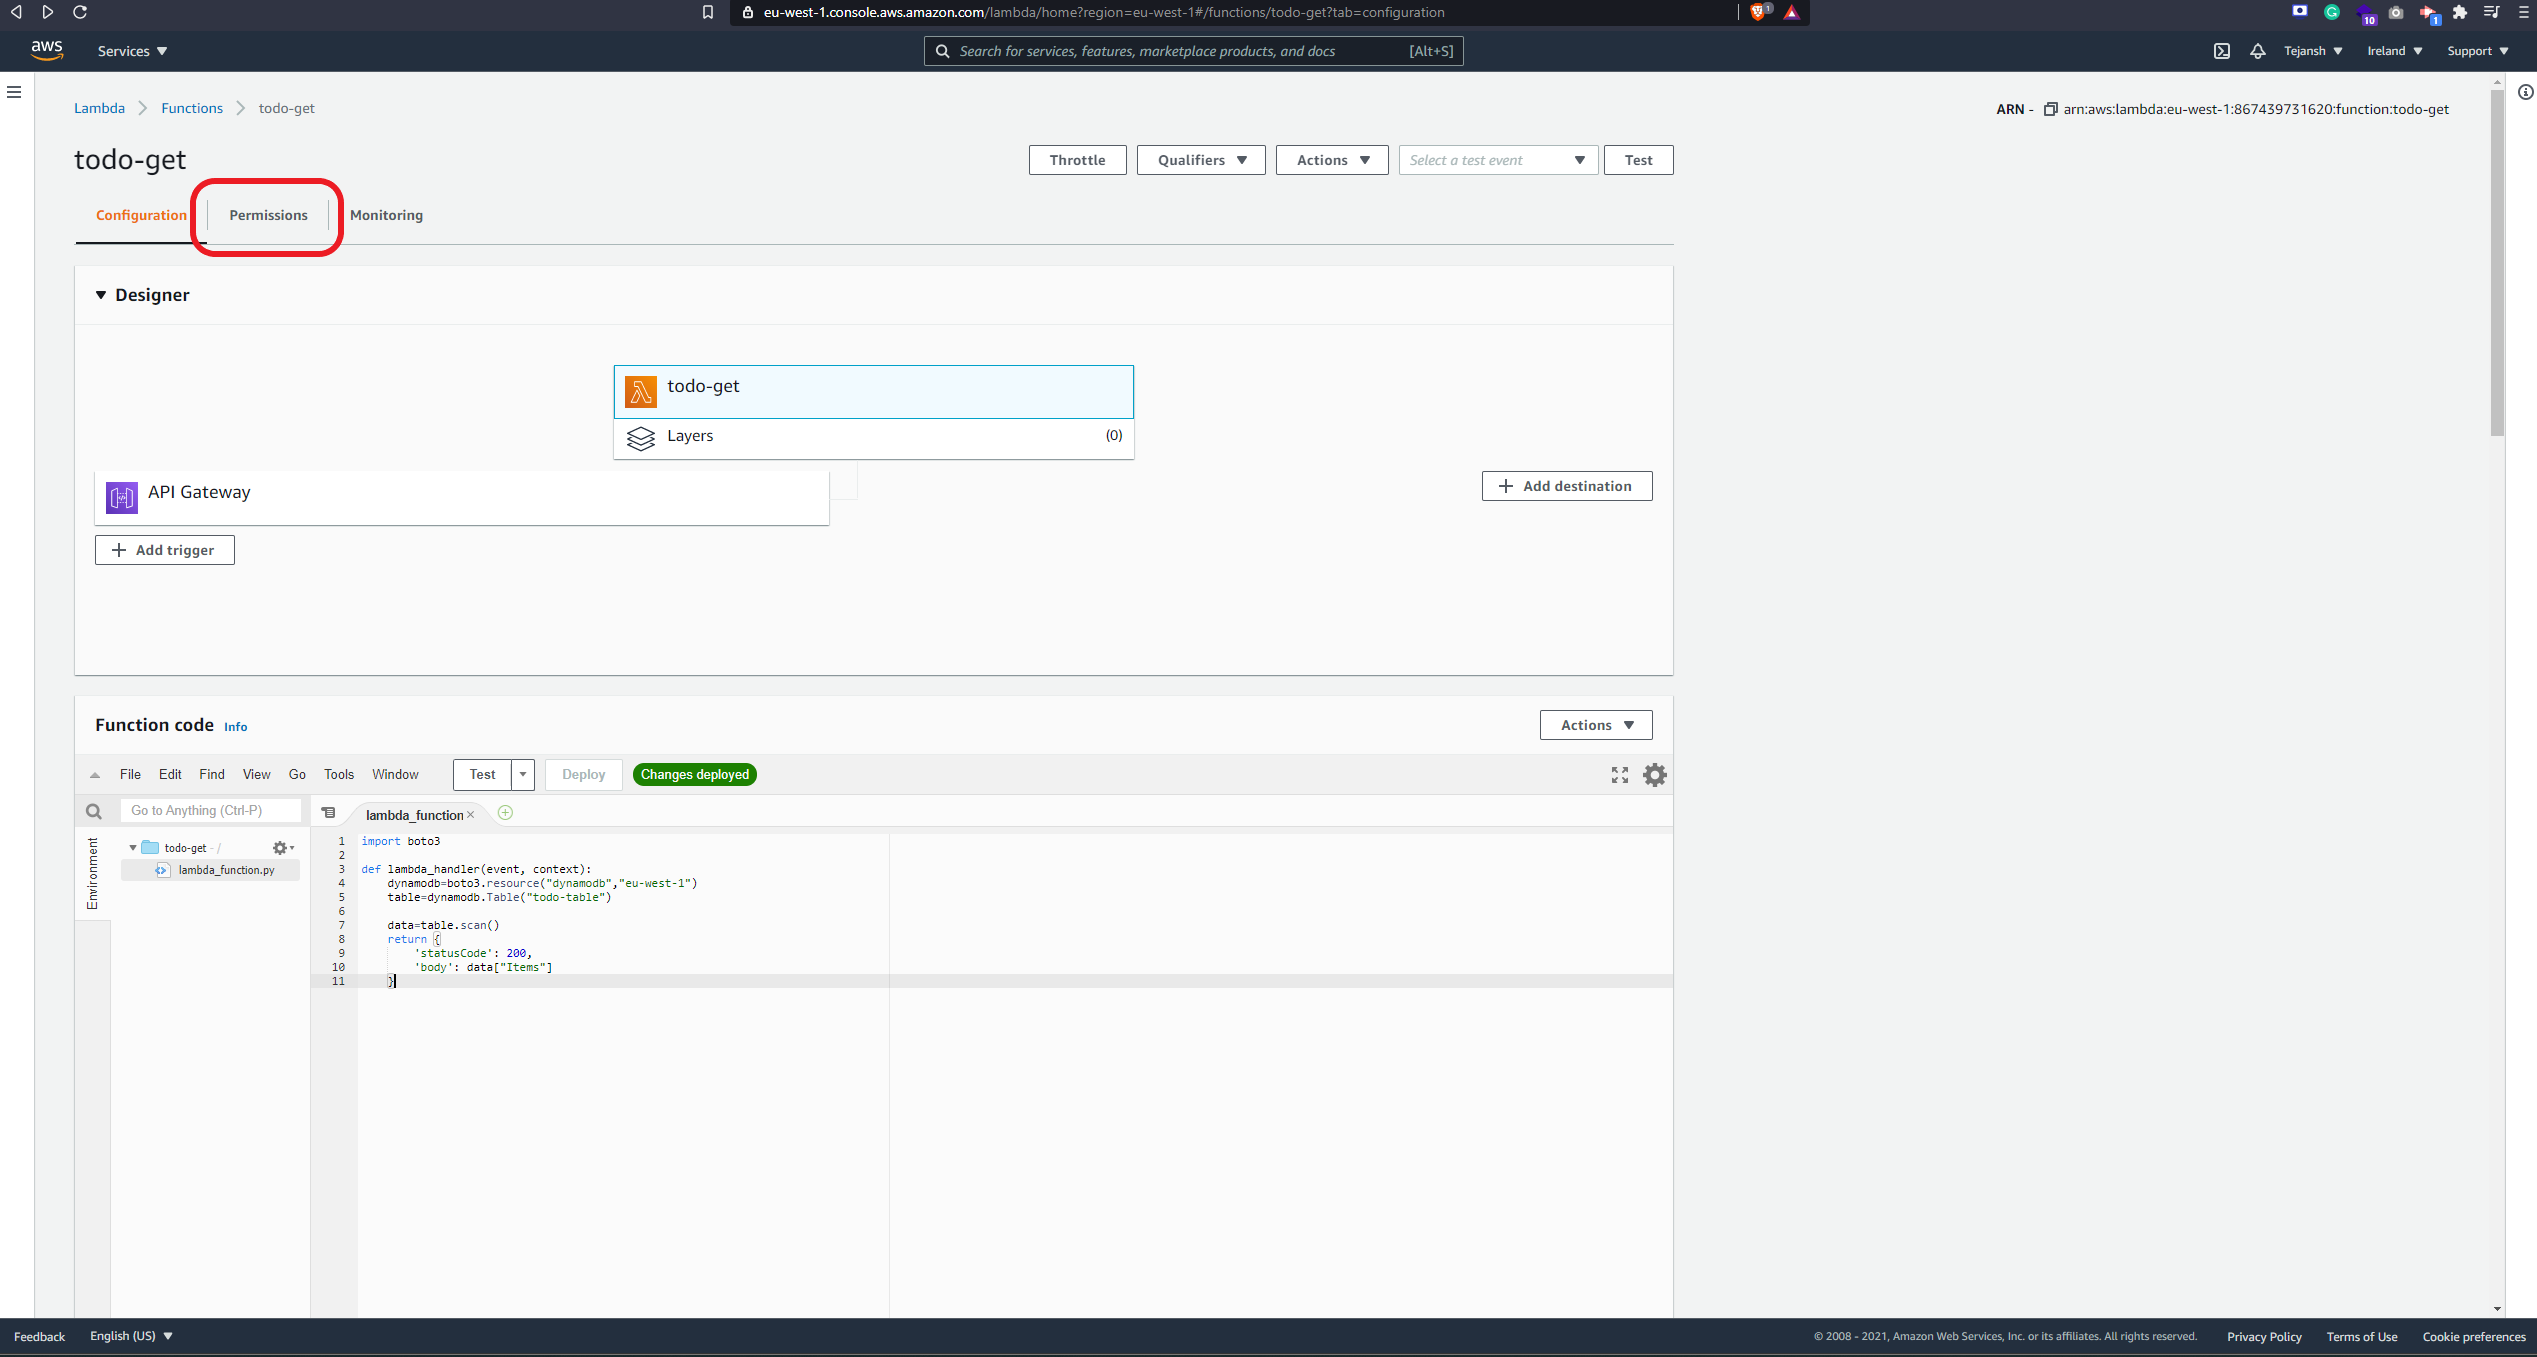
Great, our function should look like below:
import boto3

def lambda_handler(event, context):
    dynamodb=boto3.resource("dynamodb","eu-west-1")
    table=dynamodb.Table("todo-table")

    data=table.scan()
    return {
        'statusCode': 200,
        'body': data["Items"]
    }
Note that we are only returning items from the dynamo DB response since the response contains a lot of metadata that we don't need here whereas items is the actual data from the table.
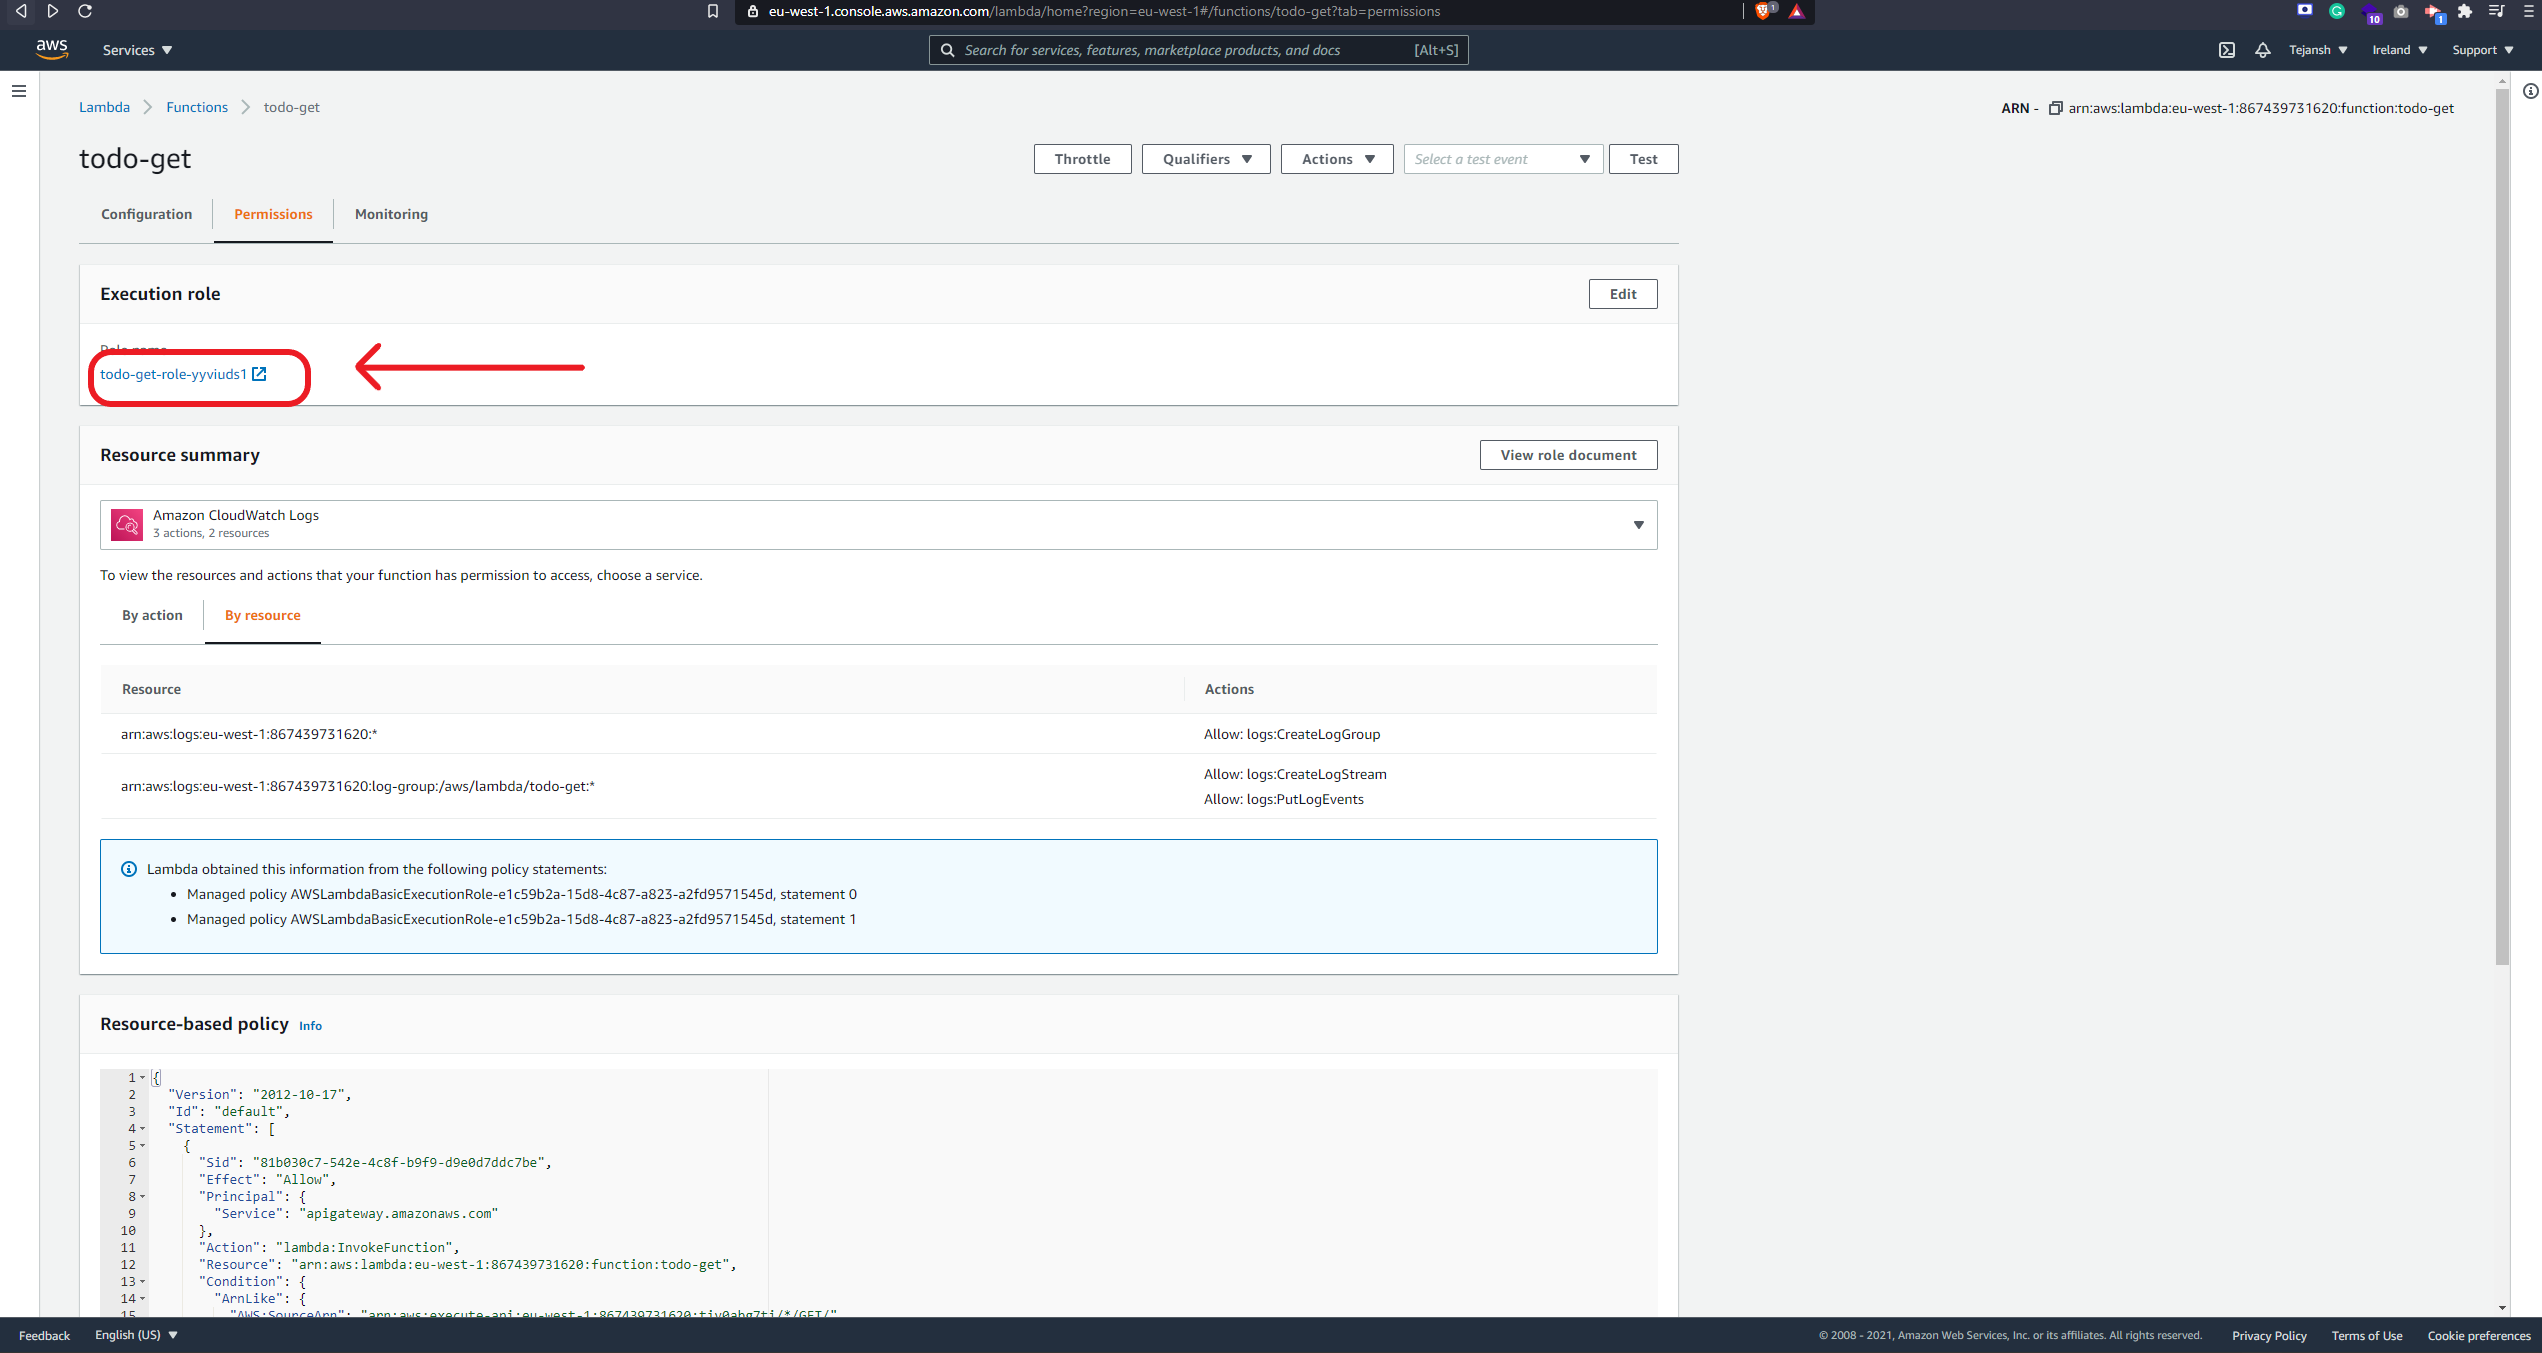
Now, click on the deploy button and this will deploy the todo-get function. We now need to give this function permission to read from our dynamoDB table. To do so, click on the Permissions tab as I've highlighted below:
Now, let's edit the permissions. Click on the Role name highlighted below and that will open another tab to edit permissions:
On this page, click on the Attach Policies button, and on the next page type Dynamo in the search box. Now, from the options that show up, click on the checkbox next to the AmazonDynamoDBFullAccess option. This allows your Lambda to read/write to the DynamoDB table.
Great, one down, one more to go! 😎
Next, let's build the post API. Similar to the previous steps, click on Lambda and create a function called todo-post and choose Python 3.8 as your runtime.
Here, we will write the logic to add data to the DynamoDB table. We will be again using the boto3 library to talk to our todo-table DynamoDB table. To put a record in Dynamo DB, we can do the following:
    dynamodb=boto3.resource("dynamodb","eu-west-1")
    table=dynamodb.Table("todo-post")
    table.put_item(
  # This condition ensures that the ID does not already exist in the table
        ConditionExpression="attribute_not_exists(id)",
        Item={
  # We are using a UUID library to generate a random UUID as our ID
            "id" : str(uuid.uuid4()),
  # In the POST request, we expect a JSON body with key "task"
            "task" : event["task"]
        }
        )
As mentioned in the comments, we are using a python library called UUID. Note that this is not necessary and we are doing this to ensure our IDs are unique. You can use any logic to generate these IDs as far as they are unique.
The entire function looks like below:
import boto3
import uuid

def lambda_handler(event, context):
    dynamodb=boto3.resource("dynamodb","eu-west-1")
    table=dynamodb.Table("todo-table")
    table.put_item(
        ConditionExpression="attribute_not_exists(id)",
        Item={
            "id" : str(uuid.uuid4()),
            "task" : event["task"]
        }
        )
    return {
        'statusCode': 200
    }
Now, click on the Deploy button and give it the same permissions as the previous Lambda function. You can follow the same steps.
And our application is ready! 😍
The POST API we just created expects a JSON body like below:
{
   "task": "Build amazing stuff!"
}
The Gateway
Since our functions are ready, we need to expose them as REST APIs. To do that, we will be using API Gateway. You can go to the API Gateway service and the landing page will ask you to Choose an API Type. Since we are building REST APIs, click on build button under the REST API option.
The next page will have 4 options on top and by default, AWS chooses Example API for you. You can ignore that and click on the New API radio button instead. Next, add a name for your API. I am calling it todo-api. Leave the rest as is and click on Create API button. This will bring you to the following page:
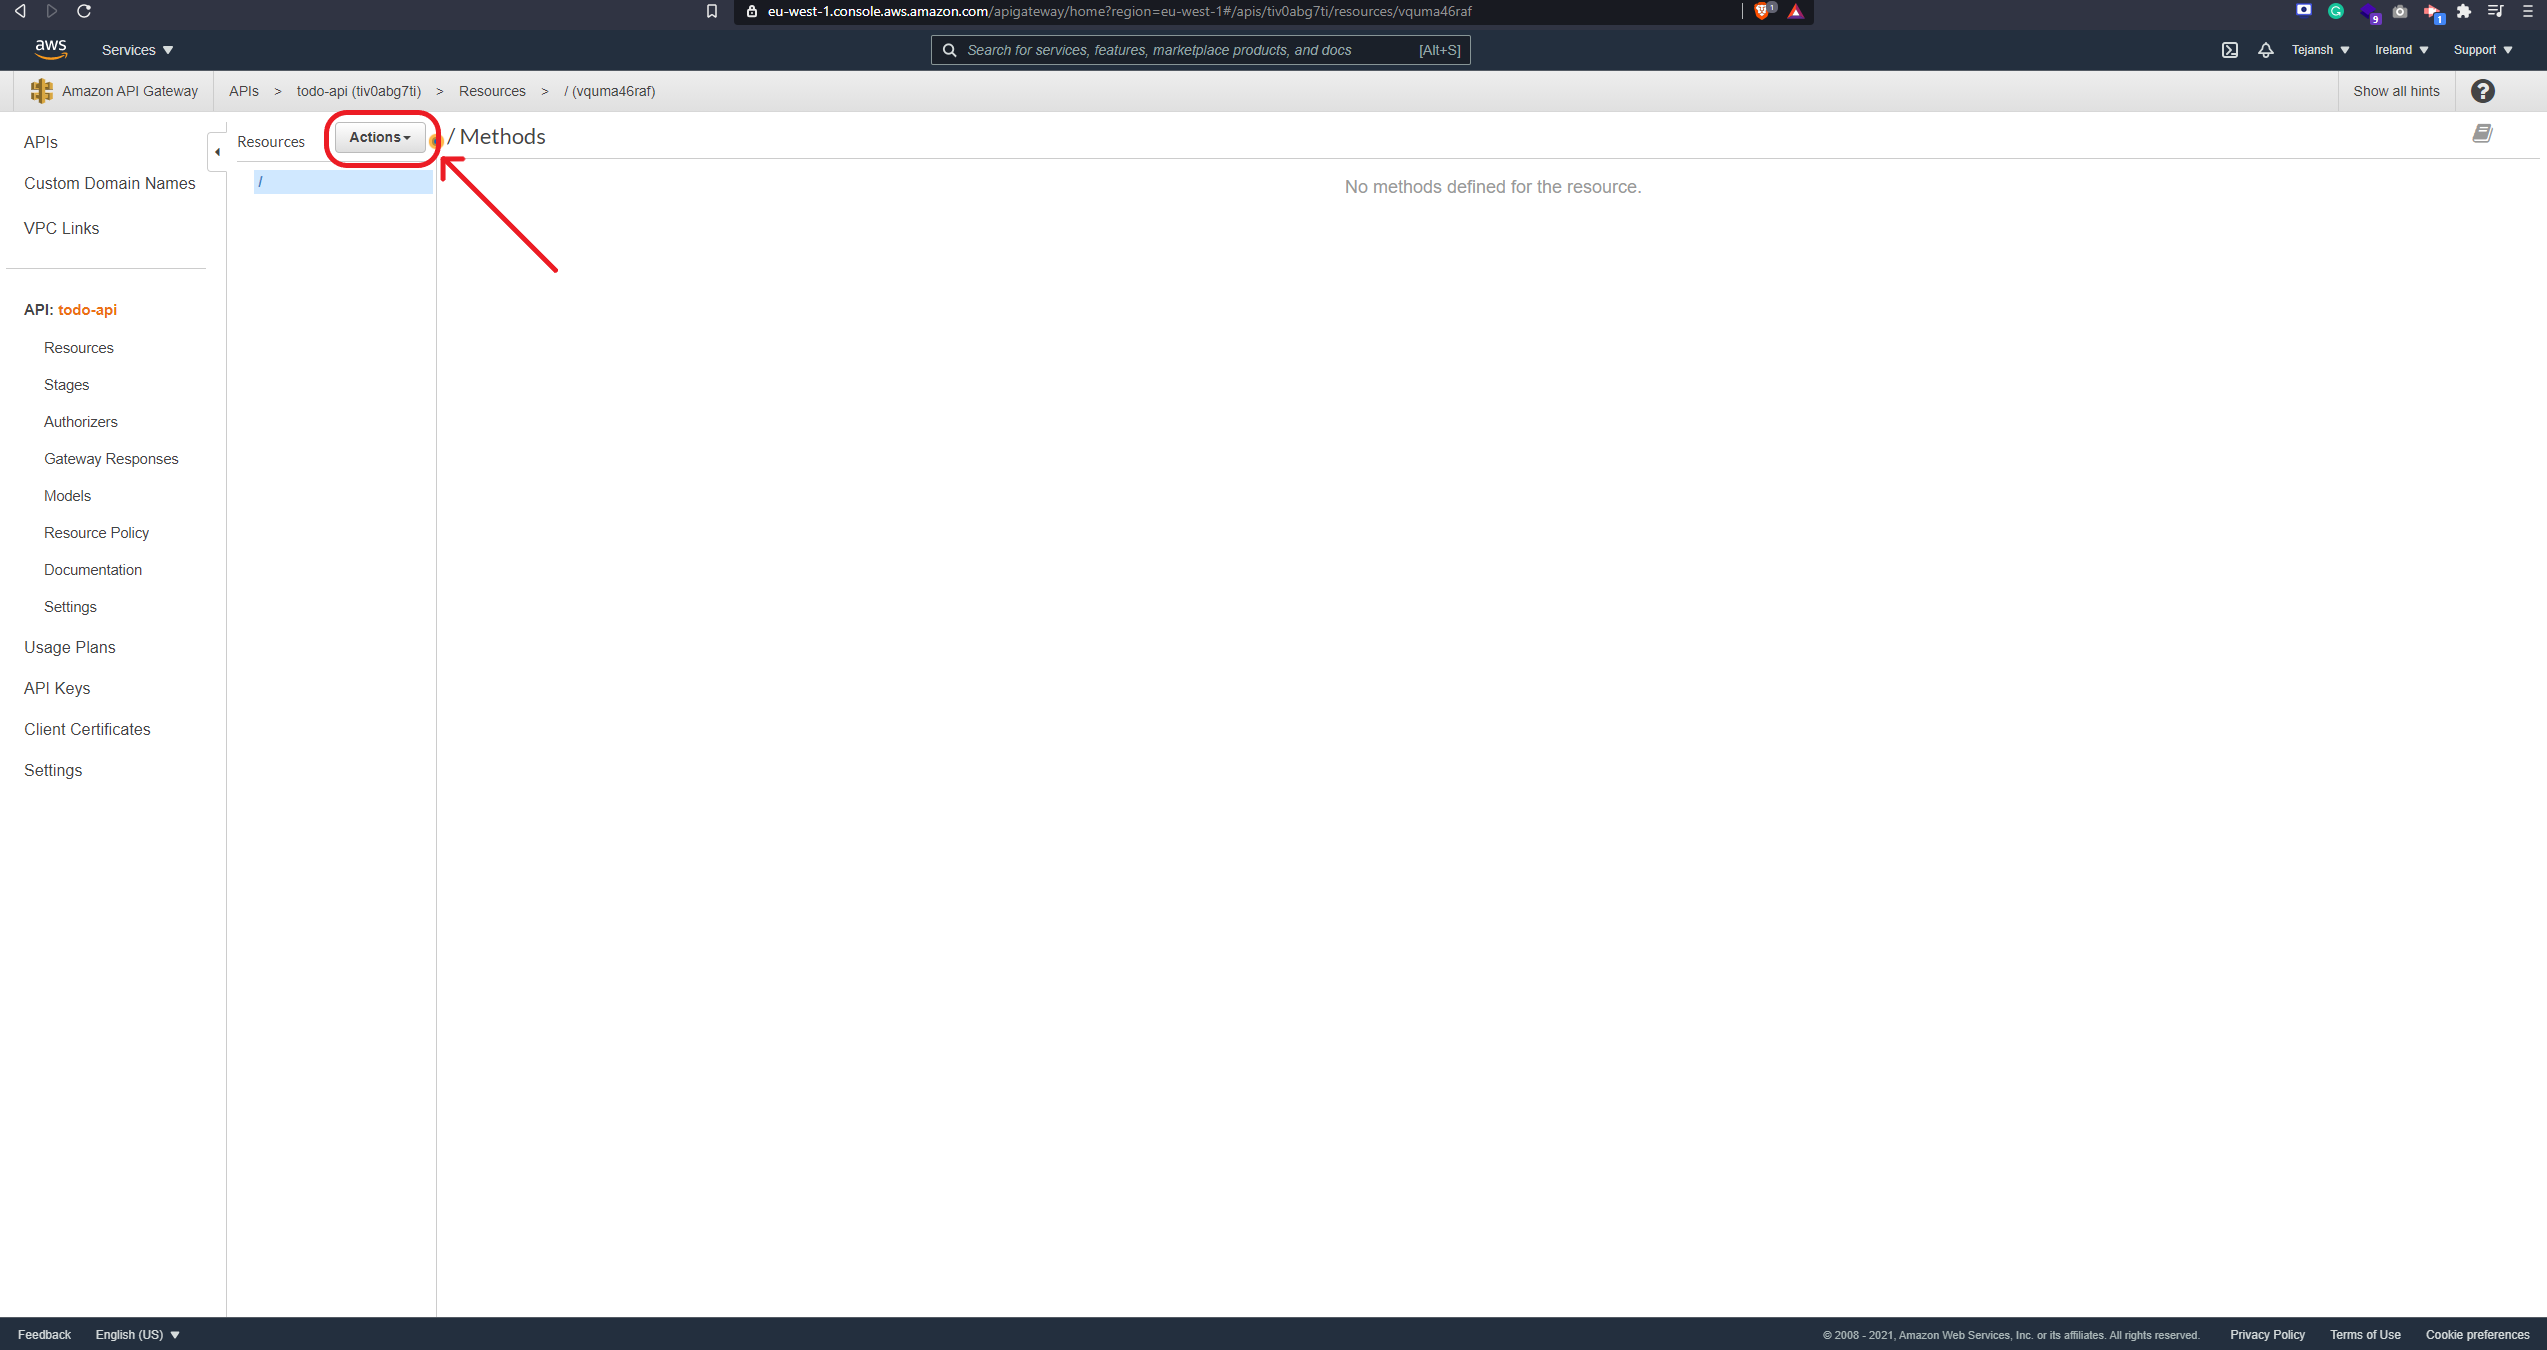
Now, we will create a GET and a POST endpoint for our Lambdas. To do this, click on the Actions button highlighted in the screenshot above and select the first option - Create Method. First, select GET and click on the tiny ✔ button next to it. This will open a few options for you on the right. Under the Integration type, choose Lambda Function and this will allow us to integrate this endpoint with the Lambda function we have previously built. To facilitate this integration, enter the name of the first Lambda function we'd built in the input for Lambda Function. Since my Lambda was called todo-get, I will enter that. Next, click on Save. This will open a dialog box where it will ask you to confirm that you are allowing the API Gateway to talk to Lambda. Click on OK since we want to give this permission.
Now, let's create the POST method similar to the GET one i.e. click on Actions -> Create Method -> POST ✔ -> Integration type -> Lambda Function. Now, enter the name of the second Lambda function we have built. I will enter todo-post since that is the name of my Lambda function. Save this and click ok on the permissions dialog box.
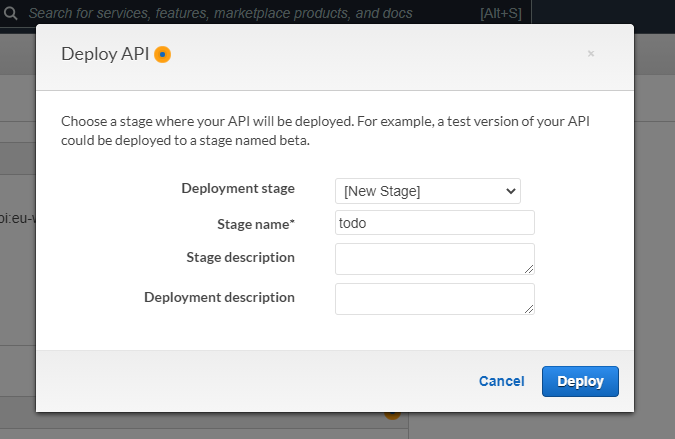
Perfect, our APIs are ready to be deployed now! Click on Actions again and now click on Deploy API. This will open a dialog box with 2 options - Deployment stage and Deployment description. Click on the drop-down for Deployment stage and click on [New Stage] and this will open 2 more input boxes. In the Stage name* input enter the name of your endpoint. I will call it todo. This is what the dialog box should look like now:
And your APIs are now deployed! 🚀
The next page would look like below:
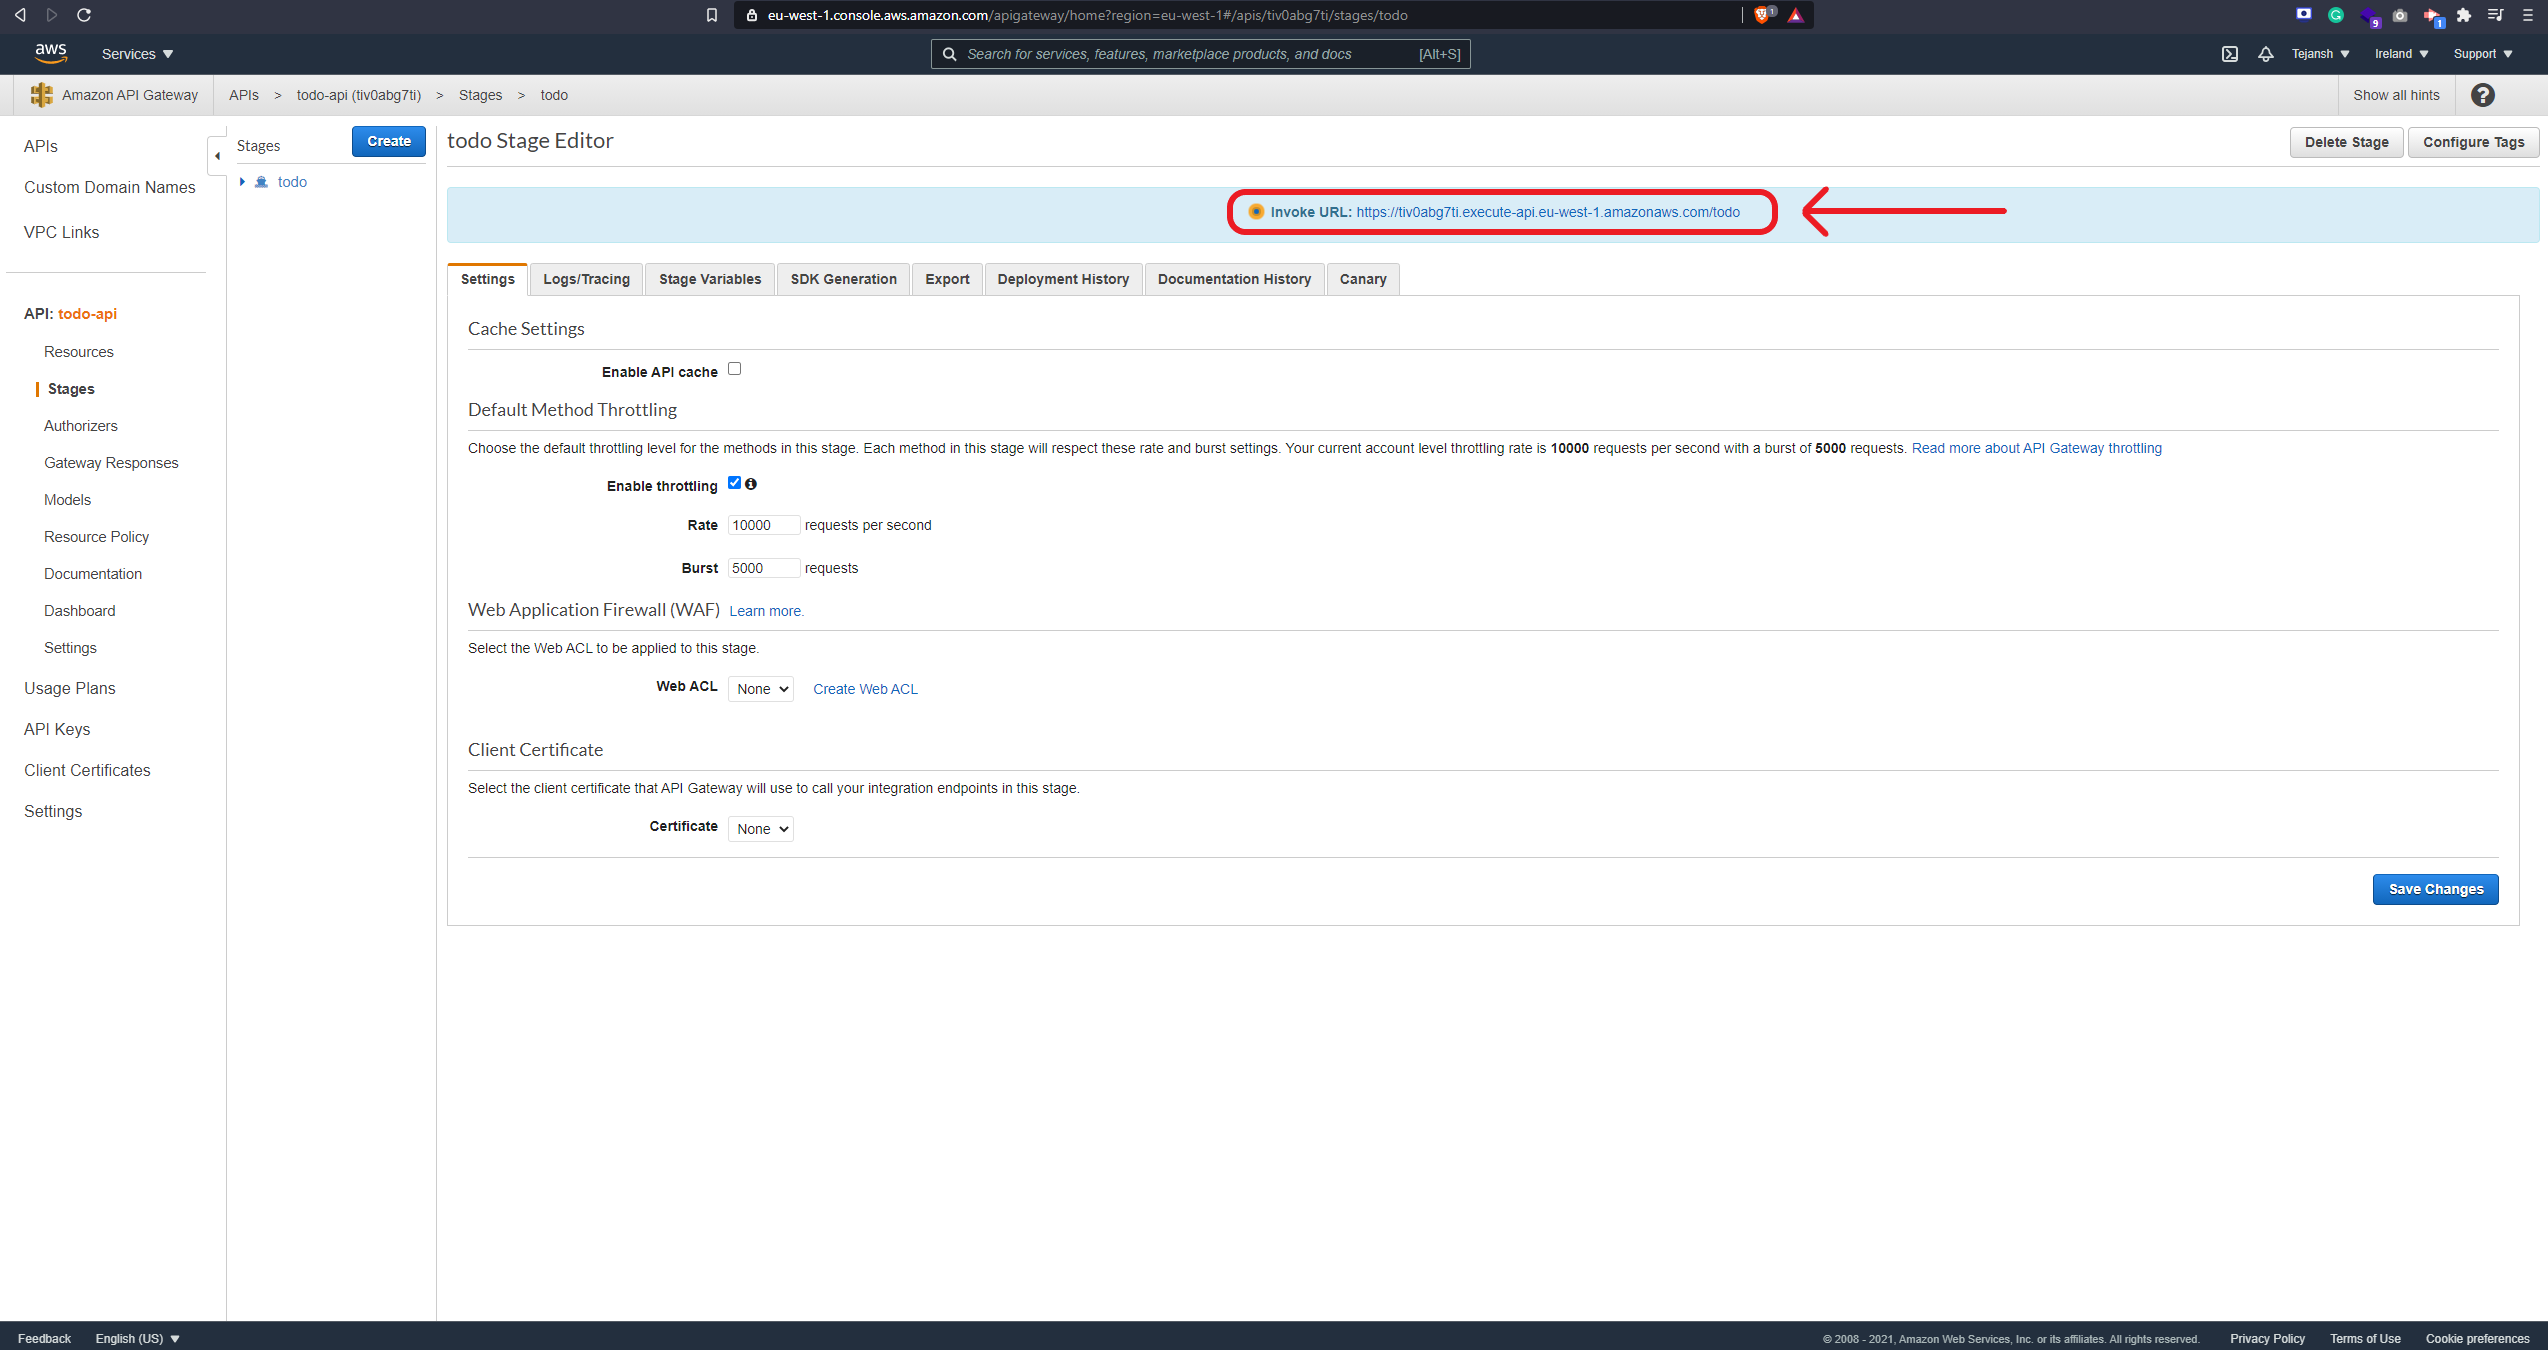
The endpoint for our APIs is the one highlighted in the screenshot above. Let's test these APIs now:
You can use a tool of your choice for this. I'd be using Postman to test the APIs.
- The POST API can be tested as follows:
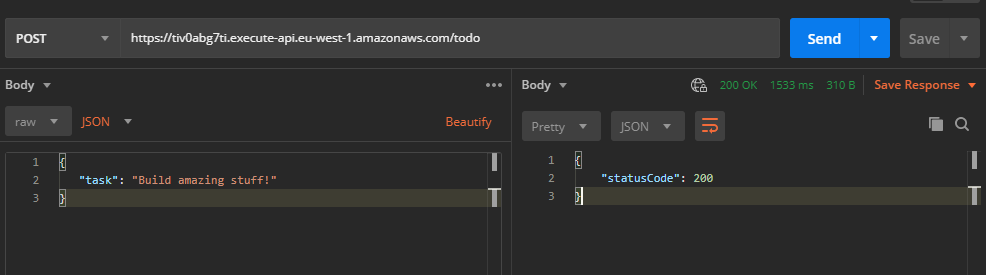
The endpoint is what we got from API Gateway after deployment, the method is POST, and the body is a simple JSON with a key task and a value of your choice.
After sending the request, you should see a JSON returned with key statusCode and value 200. This would mean that our test passed! 😎
- The GET API can be tested as follows:
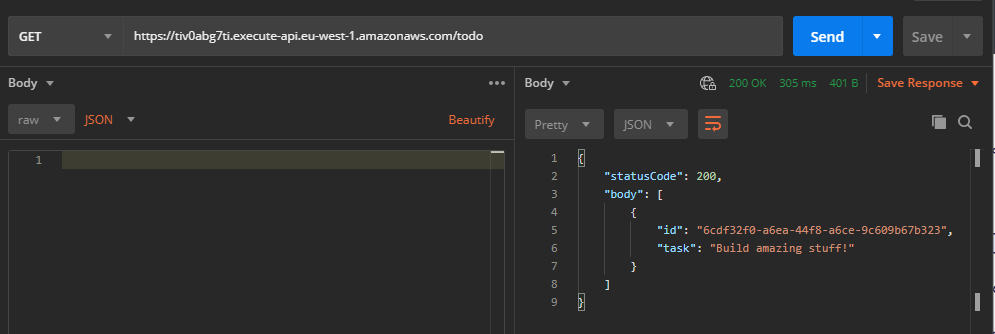
The endpoint is the same as it is for the POST API and the method changes to GET. Since it is a GET API, we should not have any body in the request. When you send this request, the response should contain the task you had added in the POST API test. If you see that, our test has passed again!
Congratulations! You've built your first Serverless application! 🚀🚀
Note: In the next part, we will add authentication to these APIs. Until then, note that these APIs are open to the world and anyone that has your endpoint can call it several times. In order to avoid this, I'd suggest deleting the API for the time being as below:
- Go to API Gateway from AWS console.
- Select the radio button next to the name of your API.
- Click on the
Actionsbutton and select Delete.
This will delete your APIs, not the Lambda functions, or DynamoDB table. You can delete them as well or leave them until we finish this series.
You can checkout the source code for the Lambda functions from my repo here.


